Category: Crochet Techniques

  • Crochet Poncho Pattern with Sleeves

    Crochet Poncho Pattern with Sleeves

    Crocheting is more than just a hobby; it’s an art form that blends creativity with practicality. One of the most versatile and stylish projects you can create is a crochet poncho pattern with sleeves. Unlike traditional ponchos, these designs offer extra warmth and structure while keeping the cozy drape. Whether you’re new to crochet or looking to expand your wardrobe with handmade fashion, learning how to make a poncho with sleeves is a rewarding experience. Exploring crochet courses online can guide you through techniques, stitches, and styling tips, ensuring you gain the skills needed to create your wearable masterpiece. This tutorial will cover the essentials: tools, stitches, sizing, and styling.

    Why Choose a Crochet Poncho Pattern with Sleeves?

    A crochet poncho pattern with sleeves is the perfect project for those who want comfort and style in one piece. Unlike shawls or wraps, ponchos with sleeves stay in place and allow freedom of movement. They’re ideal for layering during fall or chilly evenings, giving you both functionality and elegance. Ponchos are also highly customizable; you can play with yarn types, colors, and textures to match your personality. If you’re enrolled in an advanced crochet course, you’ll also learn techniques to add intricate stitch patterns and professional finishing touches, taking your poncho designs to the next level.

    For anyone who wants to learn to crochet, starting with a poncho is both motivating and practical. It teaches you how stitches come together in large projects while providing a finished product you’ll be proud to wear.

    Essential Supplies for Your Crochet Poncho

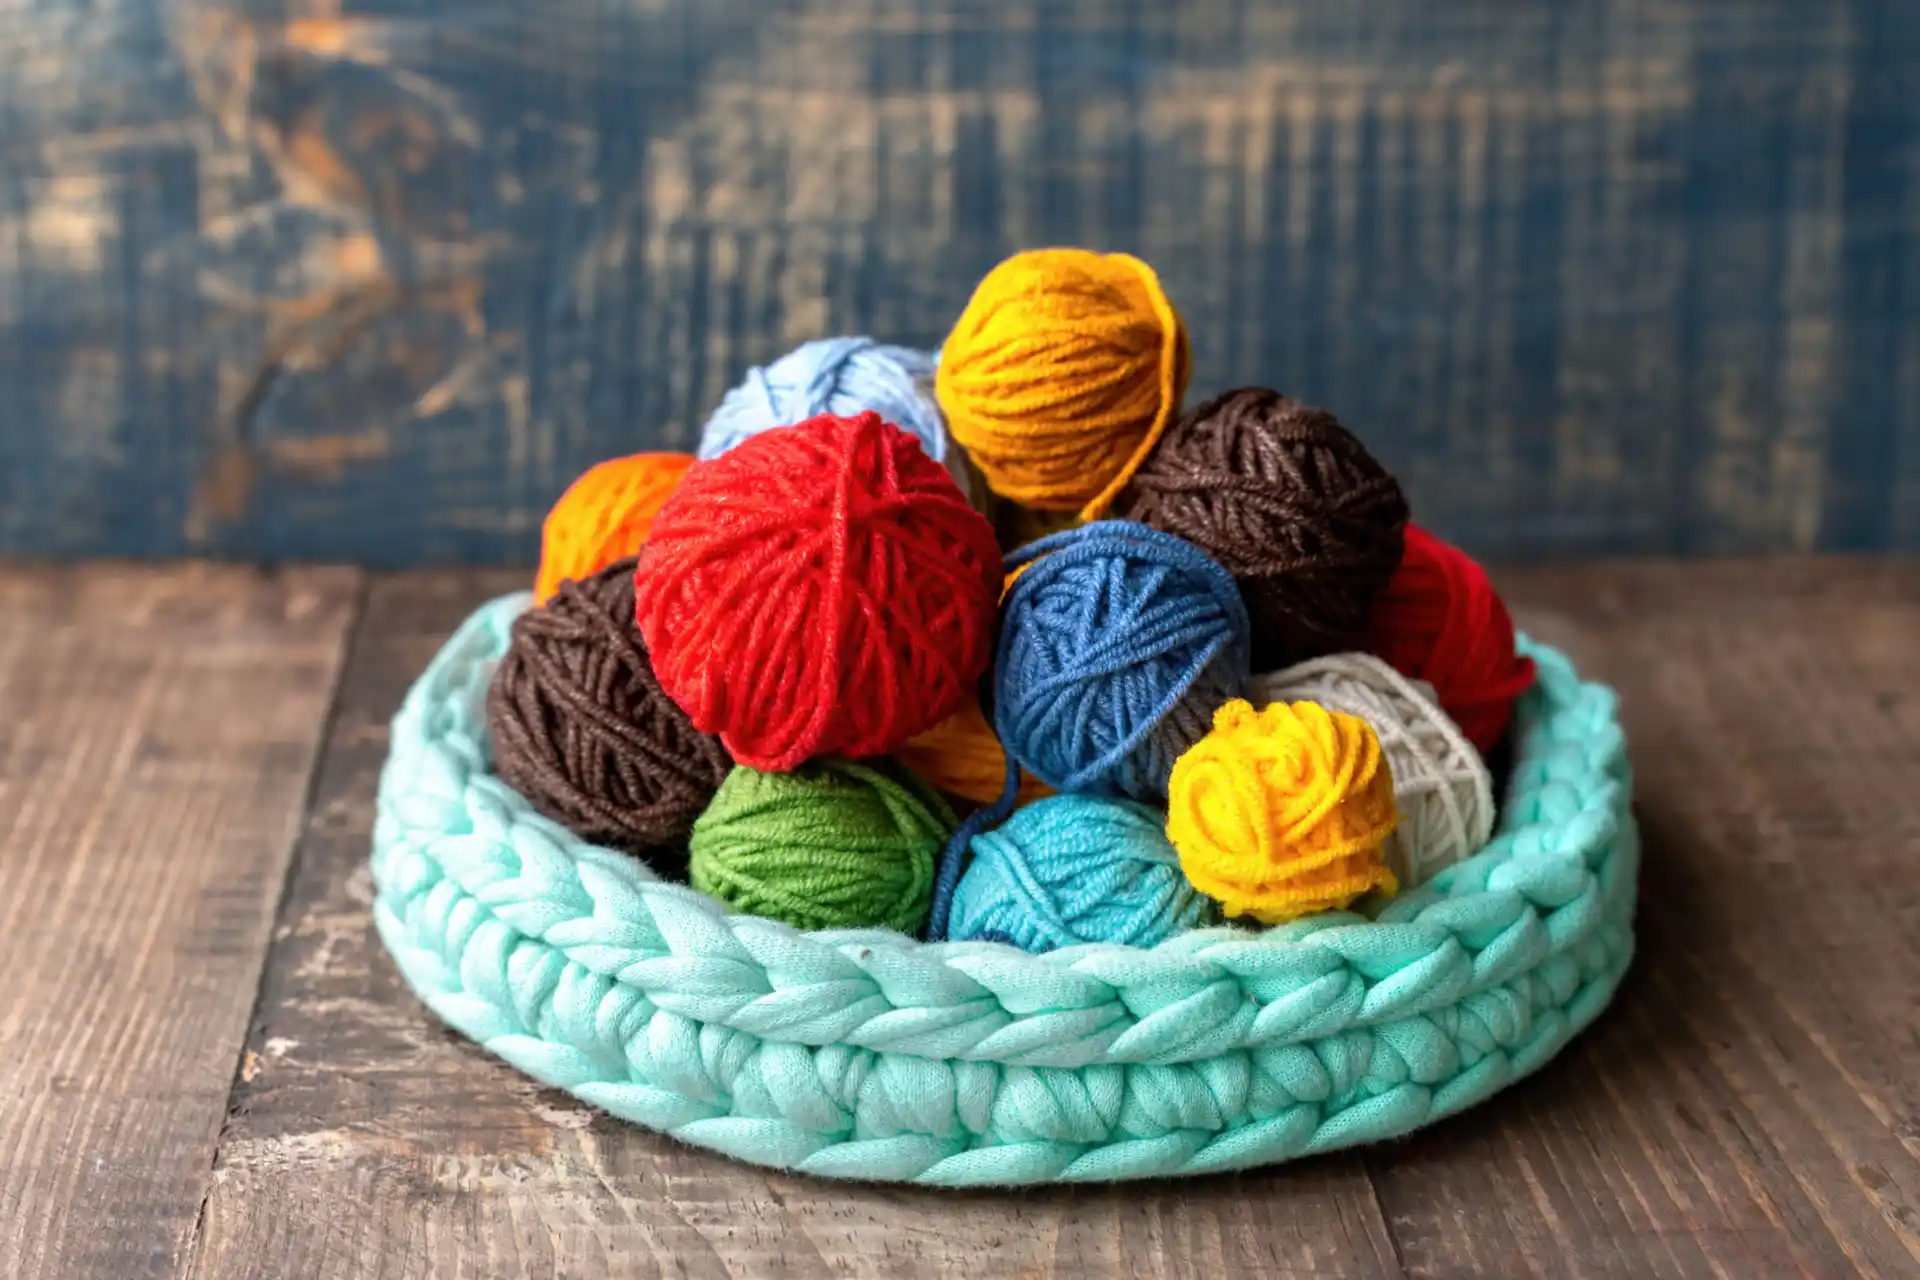
    Before starting your crochet poncho pattern with sleeves, gather the right supplies. Having everything ready will make the process smoother:

    • Yarn: Choose a soft, medium-weight yarn for comfort and durability.
    • Hook: A hook size that complements your yarn (often 5mm–6.5mm).
    • Measuring Tape: For accurate sizing.
    • Scissors: Sharp for neat cutting.
    • Yarn Needle: To weave in ends seamlessly.

    Beginners working on learning crochet for beginners will find this supply list straightforward, helping them prepare without confusion. Remember, choosing the right yarn makes a significant difference in the drape and feel of your poncho.

    Basic Stitches Needed for a Crochet Poncho Pattern with Sleeves

    Creating a crochet poncho pattern with sleeves doesn’t require advanced skills. You can build one using simple, foundational stitches:

    • Chain Stitch (ch) – the base of every project.
    • Single Crochet (sc) – tight, sturdy stitch.
    • Double Crochet (dc) – looser and adds drape.
    • Slip Stitch (sl st) – joins pieces neatly.

    When you learn crochet stitches, these basics become your toolkit for larger projects. The best part is that combining them creates endless textures and designs. Even if you’re just starting, these stitches will give your poncho a professional finish.

    Step-by-Step: How to Start Your Poncho

    To begin your crochet poncho pattern with sleeves, you’ll typically start with a rectangular or circular base. Rectangular ponchos are beginner-friendly, while circular ones provide a traditional drape. Follow these steps:

    1. Measure from the shoulder to the desired length.
    2. Create a foundation chain that matches your size.
    3. Alternate between double and single crochet rows for texture.
    4. Shape sleeve openings by leaving spaces while crocheting.
    5. Add rows around the armholes for structured sleeves.

    Those who learn crochet stitches will appreciate how these steps bring structure to creativity. With patience, you’ll have a poncho that’s both stylish and practical.

    Styling Your Crochet Poncho with Sleeves

    The beauty of a crochet poncho pattern with sleeves lies in its versatility. You can dress it up or down depending on the occasion. Pair it with jeans and boots for a casual outing or layer it over a dress for a chic evening look. Adding fringes or tassels at the hem can also bring a playful vibe to your project. For those following a beginner crochet course, ponchos serve as an excellent project to expand skills beyond small accessories. They teach shaping, stitch consistency, and the art of combining function with fashion, preparing you for more complex garments like sweaters or cardigans.

    Common Mistakes to Avoid in a Crochet Poncho

    While making your crochet poncho pattern with sleeves, beginners often run into common pitfalls. Being aware of these will save you time and frustration:

    • Incorrect sizing: Not measuring properly before starting.
    • Uneven tension: Inconsistent stitches create irregular drape.
    • Skipping stitches: Leads to gaps or uneven sleeve holes.
    • Wrong yarn choice: Can affect comfort and durability.

    By practicing consistently and double-checking your work, you’ll quickly refine your technique. If you’re still learning crochet for beginners, mistakes are part of the journey, each one helps you grow.

    Adding Sleeves to Your Poncho

    The defining feature of a crochet poncho pattern with sleeves is, of course, the sleeves. Adding them requires careful shaping and joining. Once your poncho body is complete, you’ll crochet around the armhole openings in rounds. Work a few rows in single crochet for structure, then switch to double crochet for flow. Adjust the length based on preference—short sleeves for spring, longer ones for winter coziness. If you’re enrolled in a crochet pattern design course, mastering sleeves teaches you how to structure and document this step clearly, giving you the skills to create adaptable and professional patterns

    Tips for Perfecting Your Poncho Design

    Crafting a polished crochet poncho pattern with sleeves is all about the details. Here are some quick tips:

    • Use stitch markers to track rounds.
    • Block your poncho after completion to shape it evenly.
    • Add decorative borders or fringes for a unique touch.
    • Experiment with color changes for patterns.

    For those who learn to crochet, these small steps elevate your project from simple to stunning. Over time, you’ll discover your own signature style through experimenting with different designs.

    Final Thoughts on Crochet Poncho Patterns

    Mastering a crochet poncho pattern with sleeves is a fulfilling project that combines comfort, skill, and creativity. From choosing yarn to shaping sleeves, every step offers an opportunity to refine your craft. Whether you’re making one for yourself or gifting it to loved ones, ponchos provide warmth and timeless fashion. Keep practicing, exploring, and enjoying the artistry that crochet brings. With each stitch, you’ll grow more confident and capable. If you’re eager to learn crochet stitches and document your designs, taking a crochet pattern writing course can help you clearly record each step, ensuring your projects are both stylish and professionally presented.

    Ready to create your first crochet poncho pattern with sleeves? Gather your yarn, practice your stitches, and start today! Whether you’re just beginning to learn crochet patterns or looking to expand your wardrobe, this project is both practical and stylish.

    FAQs

    What size yarn works best for ponchos?

    Medium-weight yarn is the ideal choice for ponchos because it provides the perfect mix of warmth, durability, and flexibility. It’s easy to work with, especially for beginners, and creates a beautiful drape without making the garment too bulky or heavy.

    Are ponchos suitable for crochet beginners?

    Yes, ponchos are a great project for crochet beginners. Most patterns use basic stitches and simple construction methods, making them approachable and less intimidating. Ponchos also offer a wearable and stylish outcome that helps beginners practice while building confidence with larger crochet projects.

    How long does it take to crochet a poncho?

    Crocheting a poncho generally takes between 10–20 hours, depending on the design, stitch complexity, and skill level. Beginners may take slightly longer, but the project remains enjoyable. Each hour spent adds progress and satisfaction, with the finished poncho being both practical and rewarding.

  • How to Make a Pom Pom for a Crochet Hat

    How to Make a Pom Pom for a Crochet Hat

    Comfort, fashion, and history might be some concepts used to describe crochet hats. Especially funny are these pom-poms that decorate the crown, setting them apart from other hats! Unless you are especially good, making pom-poms for a crochet hat is actually fairly easy. Any crocheted hat set off with a fluffy top would always look different, whether you are a beginner or an expert. Pom-poms tempt with cuteness and provide a means of customization for either children or adults or maybe for festive gifts! Considering crochet courses online might help to facilitate stepwise learning, and will surely direct you toward other ideas and styles of this technique until you can completely master the making of pom-poms for crochet hats.

    Why Add a Pom Pom to Your Crochet Hat?

    Pom poms give cheekiness to a crochet hat. From children’s beanies to adult winter wear, an Oceanic groovy touch is given by the poms. Knowing how to make a pom on a crochet hat can also allow one to customize size, texture, and color coordination.

    Pom poms can:

    • Add playfulness to children’s hats
    • Make adult hats trendy
    • Help use leftover yarn creatively
    • Provide a professional finish

    If you’re just starting, you may want to learn to crochet accessories before moving on to embellishments like pom poms. With practice, they’ll become one of your favorite add-ons!

    Tools and Materials You’ll Need

    Before diving into how to make a pom pom for a crochet hat, gather the right materials. Luckily, pom poms don’t require special tools; most items are already in your crochet kit or home.

    Essential items include:

    • Yarn (any leftover skeins work)
    • Sharp scissors
    • A pom pom maker, cardboard circles, or even a fork
    • A crochet needle for attaching

    So pick a soft fluffy yarn to enhance the appearance and durability of your pom poms. If you are learning crochet for beginners, trying out a few włóczka types is fun and insightful.

    Step-by-Step: How to Make a Pom Pom for a Crochet Hat

    Here’s the simplest method for beginners to follow.

    1. Wrap the yarn around a pom pom maker or cardboard cutout.
    2. Keep wrapping until the bundle looks thick and fluffy.
    3. Tie tightly around the center with strong yarn.
    4. Cut the loops on both sides.
    5. Trim edges to shape into a neat ball.
    6. Secure the pom pom to the hat using a yarn needle.

    By repeating these steps, you’ll master how to make a pom pom for a crochet hat in no time.

    Different Methods for Making Pom Poms

    Using a Fork
    Wrap yarn around the prongs of a fork, tie it around the center, and trim to finish. It’s a simple method for anybody who’s on a beginner’s crochet course and needs to learn to make a quick pom pom for a crochet hat.

    Using Cardboard
    Cut two circles with center holes, wind the yarn evenly around, cut across the edges, and tie tightly. This traditional way is an ideal exercise for a beginner to make fluffy pom poms for crochet hats. Taking a crochet pattern design course will teach you the proper steps for integrating pom-poms into your patterns using this method.

    Using Your Fingers
    This is a quick wrap with yarn around the fingers, tie the center securely, and cut the loops evenly. This method works well for anyone who wants quick results while creatively working on how to make a pom pom for a crochet hat. Practicing this method while taking a course in crochet pattern writing course  also teaches you how to document and explain embellishment methods clearly in your patterns.

    How to Attach a Pom Pom to a Crochet Hat

    After making your pom pom, secure it well so it doesn’t wobble or fall off.

    1. Thread long yarn tails from the pom pom through the top of the hat.
    2. Tie knots inside the hat to keep it firm.
    3. Weave in ends for a clean finish.

    This gives your project a neat and professional look. Once you’ve learned how to do a few stitches or taken those advanced crochet course, it’s instinctual to add embellishments such as pom poms, buttons, and appliqués to your project.

    Tips for Perfect Pom Poms

    A polished pom pom comes down to technique. Follow these tips:

    • Wrap yarn generously for fluffiness.
    • Always tie tightly at the center.
    • Trim carefully to create a round, uniform ball.
    • Mix yarn colors for a unique look.

    Creative Variations of Pom Poms

    Pom poms don’t have to be plain! Get creative:

    • Multi-colored Pom Pom: Use two or more yarn shades.
    • Oversized Pom Pom: Wrap extra yarn for bold hats.
    • Mini Pom Pom Clusters: Attach several small pom poms for fun designs.

    Exploring such ideas helps you learn crochet patterns with flair, ensuring your hats look one-of-a-kind.

    Common Mistakes to Avoid

    When first learning how to make a pom pom for a crochet hat, it’s easy to make small errors. Avoid these:

    • Tying too loosely (pom pom falls apart)
    • Cutting unevenly (lopsided pom pom)
    • Using too little yarn (flat appearance)
    • Not secured to the hat (unstable finish)

    Mastering these details is just as important as when you learn crochet stitches for your main hat design.

    How to Care for Crochet Hats with Pom Poms

    Pom poms are delicate, so proper care is essential.

    • Hand-washing instead of machine washing
    • Avoid heavy pulling on the pom pom
    • Reshape by trimming stray yarn strands

    A little maintenance ensures your crochet hat looks beautiful for years. This is a tip worth remembering for those still learning crochet for beginners.

    Final Thoughts

    Making pom poms for a crochet hat is a pretty enjoyable process in adding charm to any crochet project. They are quick to make, leaving immense room for creative expression in terms of color, texture, and style. To elaborate on this further, don’t let it stop there! Consider learning a new stitch or two, pick up a few crochet patterns… and start making some very unique, personalized designs for your handmade hats.. You can:

    • Learn to crochet new accessories
    • Try learning crochet for beginner’s guides
    • Explore how to learn crochet stitches step by step
    • Experiment with learn crochet patterns for hats, scarves, and more

    FAQs

    Is it hard to make a pom pom for a crochet hat?

    No… How does one make a pom-pom for a crochet hat in simple steps? Using just yarn, scissors, and some practice, a beginner can create fluffy pom-poms to add the final touch of style to their crochet hat.

    How long does it take to make a pom pom?

    Usually, it takes about 10-15 minutes. When practicing to make a pom pom for a crochet hat, the time may vary with the thickness of the yarn, method of wrapping, neatness of trimming, etc., all depending on what size of pom pom you want..

    What size should a pom pom be for a crochet hat?

    Pom poms usually measure 2-4 inches in diameter. The size of the pom pom selected while making one for a crochet hat should depend upon whether a subtle and neat accent is desired or a loud, fun decorative finish.

    Can I make pom poms without a pom pom maker?

    Yes! While learning to make a pom pom for a crocheted hat, one can work on forks, cardboard, or even on fingers. These inexpensive methods can yield fluffy ones and make the experience accessible and fun for beginners.

  • How to Block Acrylic Yarn Crochet?

    How to Block Acrylic Yarn Crochet?

    Imagine crochet as the dance of creativity where in the sponge yarn and hooks come to life before one’s eyes. The experience or ordeal of many a beginner is asking: how to go about blocking acrylic yarn crochet projects into a finished, refined look? Natural fibers like wool or cotton would basically hold their shape with just a little water, but it does not work for acrylic. Therefore, one must learn the art of blocking to get a good professional finish on their crochet works. For the beginner learn to crochet, online, may provide a fast track to mastering these most useful skills and not leaving you stranded on the first step. Embarking on this complete guide, you will be acquainted with everything about blocking acrylic yarn crochet-from methods, tutorials, common mistakes, expert tips to answers to frequently asked questions-and by the time the article closes, you will be fully armed to bestow your pieces with a gorgeous block finish.

    What Does Blocking Mean in Crochet?

    Blocking is the process by which the finished piece is shaped to lay flat and look neat while maintaining the proper size. An added little something for those learning crochet for beginners   wonder about blocking acrylic yarns is that blocking aligns the stitches, straightens the curls, and just improves the overall drape.

    With wool or cotton yarn, blocking is very easy, as the fibers respond naturally to water. But acrylic, being synthetic, needs a slightly different type of approach. Blocking of acrylic projects really make all the difference, more so if you are learning to crochet for yourself or for gifts. With enough patience, one can always make acrylic projects appear beautiful and refined.

    Why Blocking Acrylic Yarn Crochet Is Important

    Many crafters often ask why they should bother to block acrylic yarn crochet. The reason is that blocking changes the entire appearance of a finished project. Unblocked crochet pieces may appear crooked and curled and thus unfinished, and blocking invoicing makes the fabric appear professionally done and ready to be worn or displayed. It also blocks motifs or squares to size so that the joining seams do not become uneven. Whether learning for beginners or advanced and through the making of complex garments, blocking makes for easier joining and neater results-at the end, all becomes a showcase of your hard work.

    Different Methods of Blocking Acrylic Yarn Crochet

    When it comes to how to block acrylic yarn crochet, you can use several methods. Each has its benefits depending on the project:

    • Steam Blocking – Uses gentle heat from a steam iron to relax fibers.
    • Wet Blocking – Involves soaking or spraying with water, then pinning into shape.
    • Spray Blocking – Quick method using a mist of water and air drying.

    If you’re new and want to learn crochet stitches, test blocking techniques on small swatches before working on a big project. This way, you can see which method works best without risking your masterpiece.

    Step-by-Step Guide: Steam Blocking

    Steam blocking is the most common method of how to block acrylic yarn crochet. To try it:

    1. Place your finished project flat on a towel or blocking mat.
    2. Pin it carefully into the correct shape and dimensions.
    3. Hold a steam iron a few inches above the fabric, never press down.
    4. Release steam to soften the fibers, then allow it to cool completely.

    Steam blocking is fast, effective, and gives projects a neat finish. 

    How to Block Acrylic Yarn Crochet Using Wet Blocking

    Acrylic fibers block differently from natural fibers; however, wet blocking would improve final shaping. Spray just a little with water or dunk briefly in lukewarm water; gently squeeze out excess water and lay flat on a board, pinning into position. Let dry completely in open air.

    This method may take its sweet time, but it’s a good one to start with for the beginner exploring the blocking of acrylic yarn crochet. There is no heat involved at all, so there is little risk of harming the fibers. Any beginner going in for learning crochet might find this one easiest to begin working with.

    Spray Blocking – A Beginner-Friendly Option

    Spray blocking is great for small or delicate pieces. Just keep your crochet piece damp by misting it through a fine spray from a bottle, pin it out into the required shape, and then leave it overnight. This is especially effective if you are testing methods for blocking acrylic yarn crochet for small motifs, squares, or appliqués. It is also a safer alternative if you want a quick solution without heat. Another advantage to spray blocking is that if you’re in a beginner crochet courses online  your new stitches, it will help keep your pieces flat for neater assembly.

    Mistakes to Avoid When Blocking Acrylic Yarn

    Blocking may seem simple, but common mistakes can ruin your project. When trying how to block acrylic yarn crochet, avoid:

    • Pressing the iron directly onto the yarn (it can melt or “kill” the fibers).
    • Over-stretching can distort stitches permanently.
    • Using non-rust-proof pins that stain yarn.
    • Rushing the drying process before the fibers are set.

    Benefits of Blocking Acrylic Yarn Crochet

    Once you understand how to block acrylic yarn crochet, you’ll notice several benefits:

    • Stitches appear more even and uniform.
    • Fabric drapes better for wearable items.
    • Finished dimensions match the pattern accurately.
    • Projects look polished and high-quality.

    Blocking elevates your crochet work, making it stand out whether it’s a simple scarf or a detailed lace shawl. For crocheters who learn crochet patterns with lace or garments, this method enhances drape beautifully.

    Tips for Successful Blocking

    Here are expert tips to help perfect your technique when mastering how to block acrylic yarn crochet:

    • Always test on a swatch first.
    • Pin projects gently but firmly to hold shape.
    • Let the piece dry or cool fully before unpinning.
    • Use a towel or blocking mat for best results.

    When combined with patience, these tips ensure your projects shine. And if you’re ready to expand and learn crochet patterns, blocking will help you achieve professional results every time.

    When Should You Block Crochet Projects?

    The best time to apply how to block acrylic yarn crochet is after completing your project. Blocking before seaming squares or motifs ensures consistent sizing and alignment. For garments, blocking enhances fit and drape.

    If you’re a beginner looking to learn crochet stitches or work on an advanced crochet course, blocking makes designs more visible and elegant. Always choose the method suited to your yarn and project type.

    Final Thoughts

    The blocking technique for acrylic yarn crochet is one of the important skills to learn for crocheters of all levels. Steaming, wet, or spray blocking each gives that extra sparkle to your code. Treating your projects with love makes them look as if they came straight off a fashion runway and are ready to be worn or gifted. At Creative Butterfly, we strongly believe that every artisan should be working on the enhancement of his or her skills. Whatever the case, be it you are working on a crochet pattern design course or a crochet pattern writing course, or are simply at home practicing your stitch work, give blocking a try today, polish your blockers well, and watch your finished crochet pieces turn into art. Begin with smaller items and keep practicing; soon enough, the sky will be your limit!

    FAQs

    Is blocking necessary for acrylic yarn?

    Certainly, blocking works fine even now. Acrylic does not reshape as does wool and cotton when blocking, but if you understand acrylic blocking for a crochet yarn, blocking helps to flatten edges, even out stitches, and achieve an immaculate finish, more so for garments, blankets, and decorative crochet projects.

    Can I iron acrylic crochet directly?

    No, never put the iron directly on acrylic yarn. The heat may either burn and melt the fibers or permanently crush the stitches. The proper method of blocking acrylic yarn is to gently steam from a distance that softens fibers.

    How long does blocking take?

    Blocking time depends on the method. Spray and wet blocking may require several hours or overnight for complete drying. Steam blocking is quicker, but projects must cool fully before unpinning to ensure how to block acrylic yarn crochet sets properly.

  • How to Crochet Hydrangea Flower?

    How to Crochet Hydrangea Flower?

    Crochet Hydrangea Flower Pattern with Video Guide

    Crocheting flowers is one of the more satisfying ways to nurture the whims of creativity with yarn. Among several floral patterns, hydrangeas garner appreciation for their fluffy clustered appeal and dazzling variations of colors. If ever you have wondered how to crochet hydrangea flower, this step-by-step guide is just for you. Whether you are a total beginner or prepared to consider yourself an expert, hydrangea crochet carries the thrill and rewards of the project.

    This blog will also walk you through every step of how to crochet hydrangea flower: from choosing yarns and hooks, making petals, and putting flower heads together. Alongside this, there will be some pro tips, suggested learning routes, and a peek into the inspiring work of My Creative Butterfly, a self-taught artist noted for realistic crochet flowers and micro-miniatures.

    Why Crochet a Hydrangea Flower?

    Before diving into the details of how to crochet hydrangea flower, let’s understand why this particular bloom is so beloved in the crochet community:

    • Realistic appeal: Hydrangeas, with their multiple clustered petals, look incredibly lifelike when crocheted.
    • Versatile décor: They make beautiful embellishments for hats, home décor, brooches, and wedding bouquets.
    • Creative expression: You can customize hydrangeas in shades of pink, blue, purple, or white to match any theme.

    Materials You’ll Need

    To learn how to crochet hydrangea flower, gather the following essentials:

    • Yarn: Choose cotton or DK-weight yarn in hydrangea-like colors (lavender, pale pink, blue, white, or green).
    • Crochet hook: A 2.5mm to 3.5mm hook works best for delicate petal work.
    • Tapestry needle: For stitching petals and weaving in yarn tails.
    • Floral wire and tape: To shape and support the stems.
    • Scissors: For neat trimming.

    Optional but useful: stitch markers, hot glue gun (if preferred for assembly), and blocking pins.

    Step-by-Step: How to Crochet Hydrangea Flower

    Let’s break down the process of how to crochet hydrangea flower into manageable steps.

    1. Making Individual Petals

    Hydrangeas consist of many small, four-petaled florets.

    To make one floret:

    1. Start with a magic ring.
    2. Round 1: Chain 1, make 4 single crochets (sc) into the ring. Pull tight and slip stitch to the first sc.
    3. Round 2 (petals):
      • Petal 1: Chain 2, work 1 half double crochet (hdc), 1 double crochet (dc), 1 hdc, chain 2, slip stitch into same stitch.
      • Repeat the petal sequence in the next 3 stitches to form a four-petal floret.

    Table 10–15 florets for a small hydrangea, or 30–40 to fill out the bloom. The repetition has a meditative effect and enhances your stitch control. If you are a real novice, it would be better to first enroll in a beginner crochet course that helps you get confident with basic stitches before proceeding with hydrangeas.

    2. Shaping the Petals

    To elevate the look of your florets, gently block the petals:

    • Dampen each floret lightly.
    • Use pins to shape and spread each petal evenly.
    • Let dry for several hours.

    Forming is crucial in developing realism when one is learning how to crochet hydrangea flower. This level of detailing is what distinguishes handwork from craft items made in bulk.

    3. Attaching to Stems

    Once your florets are shaped:

    1. Thread floral wire through the center of each floret and bend the tip into a small loop to hold the petal in place.
    2. Secure with floral tape, wrapping tightly.
    3. Gather several wire-stemmed florets into a bouquet.
    4. Use green yarn or tape to wrap the bouquet stem.

    This renders structure to your crocheted hydrangea and gives it a shape that imparts life to it. If you are set on making flowers from scratch, you could take an interest in an advanced crochet pattern design course to develop your skills further.

    Tips to Improve Realism

    As you explore how to crochet hydrangea flower, here are some helpful techniques for a more authentic result:

    • Mix colors: Real hydrangeas often have gradient shades. Use multiple yarn tones in a single project.
    • Use fine yarn: Finer yarn creates delicate petals, more true to life.
    • Add greenery: Crochet or embroider leaves and attach them to your flower stems for a fuller look.

    Learning from a Floral Crochet Expert

    My Creative Butterfly remains a great source of inspiration for anyone who needs a little something. She has taught herself to become an artist, with a 20-year track record. She excels in realistic crocheted flowers and in the very complicated micro-miniatures. Each object entails an intense study of nature, especially her flower pieces, which have been executed with incredible respect to shape, texture, and accuracy.

    Her journey shows what is possible once one truly masters the technique of how to crochet hydrangea flower and proceeds to build on this very skill through continuous practice and passion.

    Beyond the Basics: Elevating Your Skills

    Learning how to crochet hydrangea flower opens the door to more advanced projects. If you’re eager to push boundaries, here are some next steps:

    Creative Ways to Use Crocheted Hydrangeas

    Once you’ve learned how to crochet hydrangea flower, don’t stop at a single bouquet. Here are some creative uses:

    • Floral hairpins or headbands
    • Wedding table centerpieces
    • Bridal bouquets
    • Framed wall art
    • Gift wrapping embellishments
    • Seasonal wreaths

    Their elegance and softness make hydrangeas a perfect addition to almost any handmade décor.

    Common Mistakes to Avoid

    Even experienced crocheters encounter a few snags when figuring out how to crochet hydrangea flower. Here’s what to watch out for:

    • Overcrowding the petals: Hydrangeas are dense, but balance is key. Spread the florets evenly.
    • Incorrect yarn tension: Too tight, and petals curl; too loose, and the shape won’t hold.
    • Skipping blocking: Unblocked petals often look flat and lack definition.
    • Ignoring wirework: Stems give your bouquet life. Don’t skip this step.

    With patience, each project becomes smoother and more polished.

    Why Choose Crochet Flowers Over Artificial or Fresh?

    If you’re investing time in learning how to crochet hydrangea flower, know that you’re creating something special. Here’s why crochet flowers stand out:

    • Eco-friendly: No plastic waste, no short life span.
    • Everlasting beauty: They don’t wilt or dry out.
    • Customizable: Choose any shade or shape that fits your mood.
    • Personal touch: Handmade flowers add heartfelt value to gifts and decor.

    Final Thoughts

    Learning how to crochet hydrangea flower is a skill-building journey as well as a creative outlet. Two things are needed: a crochet hook and some yarn, and many hours of hanging out at home will give the hydrangea gardener a chance to create delicate, realistic blossoms that are forever. These beautiful clusters can speak volumes about your crochet proficiency when made for yourself, as gifts, or on special occasions.

    Set your path to floral artistry by the acculturation brought by the likes of My Creative Butterfly. She has taught us that realistic, nature-inspired creations are accessible to anyone willing to learn and experiment. From micro-minis to full-on life-honesty, her world’s ideals about nature can be expressed with nothing but yarn and imagination.

    Now, what are you waiting for? Grab your supplies, choose your colors, and plunge into the delightful world of how to crochet hydrangea flower!

    FAQs

    How difficult is it to crochet flowers?

    Flower types may be easy or difficult to crochet, depending on the pattern and stitches. Basic flower patterns suit beginners; however, the more realistic ones, like hydrangeas, need precision and layering techniques. Learning how to crochet hydrangea flower is moderately difficult; each flower head involves crocheting loads of little blossoms, which are then very carefully assembled. Uniform tension and careful attention are required, but with practice even beginners can achieve it. Using fine yarn and small hooks makes the flower highly realistic yet difficult. Overall, how to crochet hydrangea flower is manageable with patience and the right guidance.

    How long do crochet flowers take to make?

    Crocheting flowers may take from minutes to hours, all depending on the design’s intricacy, how thick the yarn is, and how much under your belt you have in crocheting. Simple flowers might take 15-30 minutes maximum, but the more intricate ones like hydrangeas could take hours. Expect to spend 3-6 hours taking one full bloom cluster through the motion of crocheting hydrangea flower. This time covers crocheting many small four-petaled flowers, shaping them, and arranging them into a realistic cluster. As one gets more experienced with how to crochet hydrangea flower, the process gets quicker and more efficient, letting one do each piece more easily and in more detail.

    What is the hardest crochet stitch to learn?

    In one of the most difficult stitches to work with, fiber artists find the bullion stitch, also called the roll stitch. Yarn is wrapped over the hook several times, then through all loops in a smooth motion down the line, which may pose a challenge for some and may not be easy even for the experienced. This stitch is utilized for flower work that is more complicated because of its texture. While you may not work with the bullion stitch directly while learning how to crochet hydrangea flower, knowing complicated stitches such as these assists in enhancing your floral designs. Grasping such stitches successfully would truly enhance the overall design once working further into advanced workmanship on how to crochet hydrangea flower.

  • How to Crochet a Poppy Flower?

    How to Crochet a Poppy Flower?

    Watch and Learn: How to Crochet a Poppy Flower

    The lasting mix of imagination, heritage, and self-expression is what crochet food has always been. Few designs will ever be so timeless and laden with meaning as the poppy flower. Learning how to crochet a poppy flower opens up endless opportunities for the crafter − charm, remembrance, or just simply for their beauty.

    This complete guide tells you how to crochet a poppy flower step-by-step, from the needed materials to the very finishing touches. Along the path, we shall be providing you with tons of tricks, tips, and resources to enhance your skills in crocheting and help you master flower patterns like never before.

    Why Crochet a Poppy Flower?

    Before moving on to our tutorial on how to crochet a poppy flower, the reasons for the unwavering popularity of this design among crocheters worldwide must be understood by going through some historical background.

    • Symbolism: The poppy flower is a symbol of remembrance, especially in countries such as the UK and Canada.
    • Aesthetic appeal: Those fiery red petals with a nearly black center make it truly arresting.
    • Versatility: There are a plethora of things for which this crochet poppy can be used, including but not limited to brooches, hats, wreaths, hairbands, and wall art.

    Materials You’ll Need

    To get started on your journey of how to crochet a poppy flower, gather the following materials:

    • Yarn: Red, black, and green (DK or worsted weight yarn works best).
    • Crochet hook: Typically 3.5mm to 4mm depending on your yarn.
    • Tapestry needle: For weaving in ends.
    • Scissors: For trimming yarn.
    • Stitch marker (optional): To keep track of rounds.

    If you’re a complete beginner, consider enrolling in a beginner crochet course to get comfortable with basic stitches before attempting this floral pattern.

    Step-by-Step Instructions: How to Crochet a Poppy Flower

    Let’s break down how to crochet a poppy flower into three parts: center, petals, and finishing.

    1. Crocheting the Center (Black)

    1. Start with a magic ring.
    2. Ch 1, make 6 sc into the ring.
    3. Pull tight and join with a sl st to the first sc. (6 sts)
    4. Round 2: 2 sc in each st around. (12 sts)
    5. Fasten off and leave a tail for sewing.

    The center represents the eye of the flower. It’s small but striking, practice this part well to add realism to your poppy.

    2. Making the Petals (Red)

    You’ll be making 4 separate petals.

    For each petal:

    1. Ch 10.
    2. Row 1: Starting from the second ch from hook, sc in next 2 ch, hdc in next 2 ch, dc in next 3 ch, tr in last 2 ch.
    3. Row 2: Ch 1, turn. tr in next 2 sts, dc in next 3 sts, hdc in next 2 sts, sc in last 2 sts.
    4. Fasten off and leave tail for attaching.

    Repeat the process four times. It is this curvature on the petals that gives a poppy its realistic flair. If you want to take the flower-making skills further, take a crochet pattern design course to design your own botanical patterns.

    3. Assembling the Poppy

    Now that you’ve got your center and petals:

    1. Lay the four petals in a circle overlapping slightly.
    2. Stitch them together at the base using the tail ends.
    3. Attach the black center in the middle using a tapestry needle.
    4. Optionally, you can crochet a green base or leaves using a simple leaf pattern (ch 6, sc, hdc, dc, hdc, sc).

    Voilà! You’ve learned how to crochet a poppy flower, a stunning, timeless creation.

    Styling Ideas for Crocheted Poppies

    Now that you’ve mastered how to crochet a poppy flower, here are a few creative uses:

    • Attach a pin back to turn it into a brooch
    • Sew onto a headband or hair clip
    • Use as an embellishment on bags or scarves
    • Make multiple for a wreath or garland

    These are just a few ideas, your creativity is the only limit.

    Tips for Realistic Results

    My Creative Butterfly is a self-taught artist who has been crocheting for over 20 years while honing her skill to produce hyper-realistic flowers and micro-miniature works that are greatly influenced by nature, especially flowers such as poppies.

    Learning from artists such as her will make one believe in the possibility concealed in every pattern and encourage that person to step a bit farther toward the unknown in designing.

    Learning More: Courses & Resources

    If you’re serious about mastering how to crochet a poppy flower, or venturing into more advanced patterns, here are some valuable learning paths:

    Whether you’re just starting or seeking to turn your passion into a profession, these resources will support you on your journey.

    Common Mistakes to Avoid When Crocheting Poppy Flowers

    While learning how to crochet a poppy flower, here are a few mistakes beginners tend to make, and how to avoid them:

    • Using the wrong hook size: Always match your yarn weight to your hook size.
    • Incorrect tension: Too tight or too loose can distort the petal shape.
    • Skipping blocking: Blocking helps shape your petals evenly.
    • Not securing tails properly: This can unravel the piece over time.

    With practice, you’ll notice these minor issues and correct them instinctively.

    Customize Your Poppy

    Part of the joy of learning how to crochet a poppy flower is the freedom to customize:

    • Use variegated yarn for a multi-tone effect
    • Add a touch of glitter yarn in the center for flair
    • Modify petal count for a fuller bloom

    Once you understand the basic construction, you’ll feel empowered to innovate.

    Why Choose Crocheted Flowers Over Real Ones?

    If you’re wondering why people go through the effort of learning how to crochet a poppy flower, here are a few solid reasons:

    • Eco-friendly: No plastic waste or short life span.
    • Everlasting: Unlike real flowers, crocheted ones don’t wilt.
    • Customizable: Adjust size, color, and style to suit your needs.
    • Therapeutic: The process of crocheting is calming and meditative.

    These benefits make crochet flowers perfect for gifts, keepsakes, and decor.

    Final Thoughts

    Learning how to crochet a poppy flower is more than just a crafting project, It is an opportunity for a person to merge creative energy with tradition and employee crafts into life’s everyday fabric. For remembrance or the mere practice of crochet, a poppy is one of the most satisfying flower designs to achieve.

    Take a cue from artists like My Creative Butterfly name that lives on as the first-ever hybrid flower designer in Canada-for she has been creating perfectly realistic flowers for more than twenty years.

    Get your hook, grab that yarn, and create your poppy blooms today.

    FAQs About How to Crochet a Poppy Flower

    How to crochet a poppy free pattern?

    If you’re looking for how to crochet a poppy flower with a free pattern, this is your first step. Basic stitches will be used: chain (ch), single crochet (sc), half-double crochet (hdc), and double crochet (dc). The simple pattern calls for one to work a black center using sc in a magic ring, then create four red petals separately that are stitched around the center. You will be able to find detailed free tutorials on prominent crochet blogs or on YouTube. This step-wise approach helps any beginner understand very easily how to crochet a poppy flower so that the end results can be used as either brooches or decorations and can also be given as gifts.

    Which is the easiest flower to crochet?

    The most basic flower to crochet is normally a simple, five-petal flower made with chains, slip stitches, and double crochets. It is ideal for those just beginning to learn the craft. Once you have grasped the basics, however, some consider it fun to learn how to crochet a poppy flower. Although not the easiest, poppies require only a few stitches and simple elements, center and petals, that with a little practice, become easy. In other words, whenever you want to advance beyond the basic flowers, learning how to crochet a poppy flower is a beautiful project to try next!

    How to draw poppy flower step by step easy?

    Step-by-step easy poppy drawing starts with the center of the flower as a little circle. Then, draw four to five large petals all overlapping, with wavy lines so that they could be described as natural or ruffled. Add a few thin, curved lines in the center, going down into the stem and leaves. Shade or color the petals bright red, and the center black. Interestingly, if you’re into crafts, learning how to crochet a poppy flower brings similar joy, translating this simple beauty into yarn form using basic crochet techniques and creativity. Try both for a fun artistic experience!

    How to crochet a simple flower for beginners step by step?

    A Member of The Simple Flower crocheters initiated this with a magic ring. Chain 1, then 5 single crochets inside the ring. Slip-stitch to join. Drawing up a loop for the petals: chain 2, 2 double crochets, chain 2, slip-stitch in next stitch, and repeat. These few stitches make for a very simple five-petal flower. From here, hopefully, one will be ready to move onto learning how to crochet a poppy flower in which petals and disk are made separately-a handsome step for beginners to take toward growing their skills.

  • How to Crochet a Forget Me Not Flower?

    How to Crochet a Forget Me Not Flower?

    Watch This Guide: How to Crochet a Beautiful Forget-Me-Not Flower

    I will never forget that first time I made a crochet forget-me-not flower; my heart smiled at what a jewel-like and fine piece it was. These little blue flowers with soft yellow centers will always hold sentimental value for me. So when I figured out how to crochet a forget me not flower, it felt like capturing a piece of nature’s poetry with my hook and yarn. In this blog, I will walk you through the process step-by-step, sharing some insights from my 20-plus years of experience crocheting realistic flowers as My Creative Butterfly.

    Why Crochet a Forget Me Not Flower?

    Let me explain the symbolism before we get into the workings of how to crochet a forget me not flower. These tiny blooms symbolize sincere love, remembrance, and bonds. A forget-me-not flower is always an appropriate choice to be made as a reminder of someone, to beautify the home with a bit of nature, or to decorate a gift.

    Self-taught, I have always found great satisfaction in interpreting the subtle beauty of nature through crocheting. I specialize in realistic crocheted flowers and micro-miniatures, with forget-me-nots being one of my favorite programs to execute for sale and teach.

    Materials You’ll Need

    To get started on how to crochet a forget me not flower, gather the following supplies:

    • Crochet hook (usually 1.25 mm – 2.5 mm for fine work)
    • Fingering or cotton thread in:
      • Sky blue (for petals)
      • Bright yellow (for center)
      • Green (for optional leaves/stems)
    • Yarn needle
    • Scissors
    • Stitch marker (optional)

    Make sure to pick a yarn with good shape retention. When it comes to realistic flowers, I go for tightly spun cotton threads because they give clean stitch definition-which is essential when making something this detailed.

    Step-by-Step Guide: How to Crochet a Forget Me Not Flower

    Now, let’s get into how to crochet a forget me not flower, step by step:

    Step 1: Start with a Magic Ring

    Using yellow thread:

    • Make a magic ring.
    • Crochet 5 single crochets into the ring.
    • Pull the ring tight and slip stitch into the first stitch to close the round.

    This forms the yellow center of the flower.

    Step 2: Create the Petals

    Switch to blue yarn:

    • In the first stitch: chain 2, 2 double crochets, chain 2, slip stitch into the same stitch.
    • Repeat this pattern in all five stitches to form five petals.

    Now your forget-me-not flower will start to take shape. This is one of my favorite moments when the flat center suddenly blossoms with texture and form.

    Step 3: Weave In Ends

    The loose ends should be woven in neatly with a yarn needle at the back of the flower.

    You can optionally attach the flower to a wire stem, or crochet a couple of leaves in green to complete the look.

    And just like that, you’ve learned how to crochet a forget me not flower with grace and simplicity.

    Tips for Crocheting Realistic Flowers

    As My Creative Butterfly, my goal has always been to bring nature’s detail into my yarn work. When learning how to crochet a forget me not flower, a few small touches can elevate your flower from basic to botanical:

    • Use a slightly smaller hook than recommended to keep stitches tight.
    • Block your finished flower gently for a clean finish.
    • Mix color tones if you want depth, like a hint of white in the blue petals.
    • Use embroidery thread for ultra-miniature versions.

    These techniques are covered in detail in many crochet courses online, especially those that focus on nature-inspired designs.

    For Beginners: Keep It Simple

    If you’re wondering how to crochet a forget me not flower as a beginner, don’t worry- it’s really a good place to start! Just four basic stitches are used in the flower: single crochet, double crochet, chain, and slip stitch. These are often introduced in a good beginner crochet course and form the foundation for all floral designs.

    Doing small projects like these will instill in you the confidence to go on to more complex designs. It will also teach you to be precise and exact with your stitches, something very important when working on micro-miniatures.

    Once You’re Ready: Make It Advanced

    As your skills improve, take your forget-me-nots to the next level:

    • Crochet multiple blooms and join them into a stem.
    • Add calyxes, leaves, and shaping wire.
    • Experiment with thread painting for added realism.

    The advanced techniques are usually taught in an advanced crochet course, where you can polish your skills and even learn professional finishing techniques. Trust me when I say that once you see your forget-me-nots set in a tiny vase, you will know how deeply fulfilling it is to work with detail.

    Designing Your Own Forget Me Not Variations

    Once you’ve mastered the basic method of how to crochet a forget me not flower, it’s time to experiment with your own variations. You could:

    • Change the size of the petals by adjusting the stitch count.
    • Make a multi-layered bloom by stacking several flowers.
    • Incorporate them into brooches, hair accessories, bookmarks, or even wearable art.

    This is where a crochet pattern design course can be extremely valuable. It teaches you how to think creatively about structure, repetition, and form, turning your ideas into custom patterns.

    Writing and Sharing Your Pattern

    If you have successfully made the flower on your own on your own version, it will have to be shared with others through the writing of a pattern, which will be your next step. The crochet pattern writing course shall assist you in constructing your pattern in an easy-to-understand format, allowing other crocheters to crochet with ease.

    Pattern writing also enhances your understanding of how to crochet a forget me not flower by making you rethink each stitch, placement, and transition.

    Why Forget Me Not Flowers Are Perfect for Learning

    From my experience guiding others, I’ve found that learning crochet for beginners is a little more exciting when something beautiful comes out at the other end. These forget-me-nots are quick to make, they teach you flower construction, and they end with something you will take pride in.

    As a matter of fact, these flower samples aid beginners in recognizing repeated stitch sequences in pattern designs, hence highlighting formation. A good and gratifying way for beginners to apply the lessons learnt.

    Stitch Knowledge is Key

    When learning how to crochet a forget me not flower, knowing your basic stitches really matters. That’s why investing time to learn crochet stitches, like single, double, and chain, is crucial before diving into more complex botanical patterns.

    Once you get this down, crocheting flowers will be easy and fun.

    Practice with Miniature Patterns

    Going even further in technique, an expert might choose to crochet ever smaller forget-me-nots with finer thread. I often use size 8 or 10 cotton thread with a 0.6 mm hook to make my micro-miniatures. Such fineness can prove a challenge, albeit an accomplishment worth attaining.

    Crocheting at this scale is a great next step for those who want to learn to crochet with a goal of mastering flower work or replicating nature in thread form.

    My Creative Butterfly: The Inspiration Behind the Thread

    As My Creative Butterfly, every flower I crochet has a story. I’m a self-taught artist; I have been crocheting for about 20 years, mainly focusing on lifelike flowers and delicate micro-miniatures. My main source of inspiration is the observation of real flowers-how they curve, layer, and play with light.

    Forget-me-nots have an important place in my work because they stand for memory and connection, things we pass on when we teach or gift a handmade flower. So if you’re wondering how to crochet a forget me not flower, know that you’re also learning to preserve something truly meaningful in thread.

    Final Thoughts: The Joy of Botanical Crochet

    Learning how to crochet a forget me not flower may seem like a small project, yet it opens avenues of creativity forevermore. From working on one’s own technique all the way to pattern designing, this little flower is a gateway to so much more.

    Then, and this is paramount, the little flower tells us that even the tiniest stitch can mean world so much. So go ahead: get your hook ready, pick out your favorite blues and yellows in yarn, and watch that creativity bloom-petal by petal.

    FAQs

    How difficult is it to crochet flowers?

    I started crocheting flowers with the thought that they must be complicated; I soon started learning the simpler, harder way. One of the easiest and most rewarding patterns is learning how to crochet a forget me not flower. With basic stitches like chain, single crochet, and double crochet, you can make a neat little fragile bloom in less than half an hour. Choosing the right yarn and hook size and being mindful of shaping the petals are the real keys. If you have mastered beginner-level stitches, you will find how to crochet a forget me not flower surprisingly easy and very satisfying.

    How long does it take for a forget me not flower to grow?

    In nature, the growth of the forget-me-not flower, from seed to bloom, takes several weeks. Fast enough for you to give it life in less than an hour with a crochet hook and some yarn. I was quite fascinated when I first learned how to crochet a forget me not flower; they come together so quickly. Just a few stitches, chains, double crochets, and slip stitches, and a single flower can be completed within 20 to 30 minutes. Isn’t that the beauty of knowing how to crochet a forget me not flower? Instant gratification and a handmade tribute to nature’s graceful charm.

    How to crochet without missing stitches?

    I once forgot some stitches, especially those tiny petals, while learning how to crochet a forget me not flower. The biggest challenge of being able to crochet without missing stitches is following the count carefully and using stitch markers, particularly for smaller or circular pieces. I always recommend hitting pause after each round and counting your stitches again. It will not only cement your accuracy but also boost your confidence as you go along. When learning how to crochet a forget me not flower, one has to focus on stitch placement because even one missed stitch affects the symmetry and final look of the flower. Practice makes perfect!

  • How to Make a Crochet Pattern Bigger?

    How to Make a Crochet Pattern Bigger?

    If you’ve ever found the perfect crochet pattern just to realize it was a little off in size for you, then, lady, you just belong in my tribe. Whether you’re creating a cozy blanket, a stylish garment, or a beautiful doily, learning how to make a crochet pattern bigger is an essential skill every crocheter should master.. This complete guide showcases how to resize your patterns, never letting designs down in the process.

    At My Creative Butterfly, we understand how frustrating it can be when the pattern you’ve fallen in love with doesn’t quite match your needs. That’s why we’ve gathered our years of experience over 20 years of crocheting with inspiration from nature and a focus on realistic flowers and micro-miniatures to help you master the art of resizing.

    Why Resize a Crochet Pattern?

    There are several reasons why someone might want to learn how to make a crochet pattern bigger:

    • The item is intended for someone taller, larger, or with specific measurements.
    • The final project needs to match home décor proportions.
    • You want to use thicker yarn for a quicker finish.
    • You’re looking to repurpose a design into something new.

    No matter your reason, learning how to make a crochet pattern bigger will open up endless creative possibilities.

    1. Use a Larger Hook and Thicker Yarn

    The easiest way to change the size of a crochet pattern is by changing the size of the hook and yarn. With a bigger hook and thicker yarn, the samples become naturally bigger in size. Then a swatch has to be made to measure the exact change in size that will occur.

    At My Creative Butterfly, we always advise people to try out different yarn and hook combinations before diving into their whole project. It actually can be a really fun creative process!

    Tip: Keep in mind that increasing hook and yarn size may affect the drape and structure of your project.

    2. Add Extra Stitches or Rows

    Another technique for mastering how to make a crochet pattern bigger is by adding additional stitches or rows. It is a simple and effective way for expanding of flat things such as blankets or scarves.

    For example, if the pattern repeat for the blanket is 6 stitches, you can add more multiples of 6 to increase the width. 

    Extra rows of stitches could require you to make some modifications to the pattern to keep the work symmetrical and aligned. However, if you’re not sure where to start, joining a crochet pattern design course may increase your confidence.

    3. Adjust the Gauge

    Gauge plays a significant role in pattern size. If your gauge differs from the original, your entire project could end up smaller or larger.

    To increase the size, try to achieve a looser gauge by:

    • Using a larger hook
    • Choosing yarn with more loft
    • Working with more relaxed tension

    By adjusting your gauge intentionally, you can learn how to make a crochet pattern bigger without rewriting the whole thing.

    4. Add Motifs or Repeats

    If your work is something motif-based like a granny square blanket or mandala, you can simply add more motifs or pattern repeats to expand the piece; this becomes pretty helpful when transforming a smaller design into a full-size project.

    My Creative Butterfly recommends maintaining balance in motif placement to achieve a harmonious finish.

    5. Modify the Pattern Instructions

    This method requires a bit more experience but is ideal for those who are familiar with crochet mathematics. You’ll need to:

    • Identify the stitch repeat pattern
    • Multiply the stitch counts proportionally
    • Maintain the shaping and design integrity

    If this sounds complex, taking a crochet pattern writing course can equip you with the skills to modify patterns confidently.

    6. Use a Different Yarn Weight

    Switching to a bulkier yarn can enlarge the final piece significantly. This technique often works best for items like scarves, shawls, and afghans, but be cautious with garments, as the drape and stretch may change considerably.

    Remember: Always make a swatch and calculate the new dimensions before beginning a large project.

    My Creative Butterfly frequently uses yarn experimentation to craft nature-inspired flower arrangements that can be scaled for different display sizes.

    7. Rescale Charts and Graphs

    Charts or diagrams may be resized digitally or by hand and then the stitch count can be adjusted accordingly. This method is an excellent way to learn how to make a crochet pattern bigger, especially when working on graphghan or tapestry crochet projects.

    8. Combine Techniques for the Best Results

    Usually, the best way to resize a pattern is to implement several of the above methods. For instance, use a bigger hook and keep adding rows. The more you try different techniques, the more you will understand how your alterations will manifest themselves in the finished piece.

    When teaching, we recommend trying a combination of two or more strategies to determine which works best for your particular project at My Creative Butterfly.

    Helpful Tools for Resizing

    To truly understand how to make a crochet pattern bigger, you’ll want to use these tools:

    • Gauge swatch: A must-have for accurate calculations
    • Measuring tape: To ensure your project stays on track
    • Graph paper or design software: Great for visualizing custom sizes

    Mistakes to Avoid When Resizing

    1. Skipping the swatch – Always test your new size before you dive in.
    2. Ignoring yarn characteristics – Fiber type, twist, and loft all affect the finished size.
    3. Forgetting to adjust shaping – If you’re making garments, shaping must also be resized proportionally.
    4. Lack of planning – Take notes and calculations seriously to prevent mid-project surprises.

    Build Your Confidence with Courses

    If you’re feeling overwhelmed by resizing, don’t worry. You can learn to crochet or refine your skills with a variety of online resources. Start by taking a beginner crochet course, then take an advanced crochet course as your confidence builds. Once confident in your skills, you can explore designing and professional pattern writing via crochet courses online for customization.

    Mini-courses and tutorials on My Creative Butterfly are regularly updated for students interested in learning nature crochet designs, including resizing of patterns to serve different purposes.

    Real-World Example from My Creative Butterfly

    Let’s say you’ve found a small flower motif and you want to turn it into a full-size table runner. At My Creative Butterfly, we would:

    1. Increase the hook size slightly.
    2. Use a heavier weight thread or yarn.
    3. Add additional motifs in a repeating sequence.
    4. Measure carefully and adjust the number of repeats to match the desired size.

    This approach keeps the delicate nature-inspired look while giving the piece more impact in its new form.

    Stay Inspired: Practice Makes Progress

    Resizing a pattern is not just technical; it forms a big part of the crochet art.  When you learn how to make a crochet pattern bigger, what you are really learning is how to adapt, improvise, and inject your own creative vision into the project.

    Practice with smaller projects. Go ahead and get experimental with different fiber types, hook sizes, and motives. Try to keep this thought in mind: the more you do, the easier it will become to think about resizing.

    If you are just starting now, check out our learning crochet for beginners resources and learn crochet stitches tutorials for you to start with. The natural next step will be learning how to learn crochet patterns and design. That is when resizing will become second-nature.

    At My Creative Butterfly, we’re here to guide you every step of the way.

    Final Thoughts

    Understanding how to make a crochet pattern bigger has just about disappeared from the mainstream technical knowledge. Consider this your opportunity to customize projects to your liking and turn these into happy moments in your crafting life.

    Expanding a motif, going through a few size changes on a garment, or just expanding that tiny doily to a big tablecloth: all that is possible to do once you know how to manipulate the patterns. With time, practice, patience, and the support of the My Creative Butterfly community, resizing will soon become second nature to you.

    Create with freedom, trust yourself, and watch all your projects blossom gorgeously, much like the nature-inspired designs that serve as our muse here at My Creative Butterfly.

    FAQs

    Can you multiply a crochet pattern to make it bigger?

    Crochet pattern vintage scale with multiplication, especially when a repeat stitch pattern is in. This means knowing the stitch repeat (let’s say multiples of 6) and increasing the number of stitch repeats in the row or round to scale the entire project. This technique will be the most sought-after for projects like blankets or scarves or anything else that is best for modular design. Hence, if you have ever wondered how to make a crochet pattern bigger, the easiest and most common answer is to multiply the stitch count. Remember to also increase your foundation chain accordingly and keep the balance and proportion so that the design does not lose its own form and symmetry.

    How to make a crochet stitch bigger?

    The bigger the crochet stitch, the bigger the hook size or yarn. All these potentialities inherently enlarge the commendable being of their own. On the other hand, lowering tensions when crocheting tend to give more room to those stitches. When you are in your early stages in learning how to make a crochet pattern bigger, altering the stitch size is a quick way of doing it. However, do remember that this might change the drape and look of your project. Hence, always make a gauge swatch first, measure out the difference, and make sure whichever alteration you are choosing to go with will not in any way distort either the design or the proportion of the original pattern.

    How do I enlarge a crochet pattern?

    Making a crochet stitch larger just means to go for an increased hook size or thicker yarn that makes each stitch naturally bigger. Loose tension may also build up large individual stitches. Learning how to make a crochet pattern bigger encompasses the very easy option of size modification of the stitches. But always beware that by enlarging a stitch, you might compromise the way a piece drapes and looks; then always conduct a gauge swatch, do the measuring, and be certain the size difference is not going to distort the entire design and proportion of the original pattern.

  • How to Crochet a Graphghan?

    How to Crochet a Graphghan?

    Has a crochet blanket ever passed before your eyes, showing a beautiful image of a character, logo, or some intricate design, and you thought to yourself, How did they do that? That’s a graphghan: graph plus afghan. If you might want to know how to crochet a graphghan, all one needs to follow are color-coded charts (graphs) and a little specialized crochet to change yarn colors as one crochets along, embedding an image or pattern in the crochet itself. It might sound complicated at the onset, but really, with the right skill set and a little practice with the right method, there is no way you could stop.

    What Is a Graphghan?

    A graphghan is a type of crochet project wherein an image along a chart is transformed into a blanket employing colorwork techniques such as single crochet, corner-to-corner (C2C), or Tunisian crochet. In case you are wondering how to crochet a graphghan, you will need to begin with a visual pattern, often a pixelated image or a graph paper chart, which you go across row by row, changing yarn color as dictated by the design.

    Here at My Creative Butterfly, we’ve been fortunate enough to train all sorts of individuals on methods for executing graphghans for their favorite photos, cartoon characters, or original art. It is rewarding to do and makes the blanket into a truly unique piece.

    Choosing a Design: The First Step in How to Crochet a Graphghan

    Essential before you even start the hooks is deciding on the right pattern. Look for very clearly defined pixel-friendly images that do not have too many minute details. Simpler pictures work best for beginners (silhouettes, for example, or bold icons).

    If you attend a beginner crochet course, it would be better to start with a small graphghan square instead of trying a full-size blanket. We at My Creative Butterfly frequently translate flower illustrations into graphghan designs; our floral creations carry the very same nature-inspired beauty upon which our brand stands.

    Creating or Finding a Graph Pattern

    Understanding how to crochet a graphghan involves learning how to read a graph pattern. These graphs are usually made up of colored squares representing each stitch. You can:

    • Download ready-made graph patterns from crochet websites or books.
    • Use online tools like Stitch Fiddle to convert images into graphs.
    • Draw your own on graph paper using colored pencils.

    In our crochet pattern design course, we teach how to create graph-based designs for customized graphghans, combining creativity with technical skills. If you want to make a one-of-a-kind gift or heirloom, this is a powerful skill to master.

    What Supplies Do You Need?

    Here’s what you’ll need to start your graphghan journey:

    • Yarn in various colors (based on your design)
    • Crochet hook (often G/6 or H/8)
    • Yarn bobbins (to keep different colors organized)
    • Graph pattern or chart
    • Scissors, tapestry needle, and stitch markers

    At My Creative Butterfly, we always recommend using high-quality yarns with minimal fuzz, so the image comes out clear and crisp. Yarn selection plays a big part in the overall impact of your finished piece.

    Techniques for Graphghans

    1. Single Crochet (SC) Method

    This is the most common method for beginners learning how to crochet a graphghan. You simply follow the graph, working one single crochet per square, changing colors as indicated.

    2. Corner-to-Corner (C2C)

    Instead of working in straight rows, C2C is worked diagonally from one corner to the opposite. Each colored pixel becomes a block of three double crochets. This method adds texture and drape, but requires careful counting.

    3. Tunisian Crochet

    Tunisian is perfect for photo-realistic graphghans because it forms a tighter fabric with less color bleed. It’s a bit more advanced, but incredibly rewarding.

    We walk through all three of these techniques in our advanced crochet course at My Creative Butterfly, helping students decide which is best for their specific project and comfort level.

    How to Manage Yarn Changes

    One of the biggest learning curves in how to crochet a graphghan is color changes. Here are a few tips:

    • Use yarn bobbins for each color section to avoid tangles.
    • Carry yarn across short distances (if the same color is reused soon).
    • Use the tapestry technique to hide yarn tails inside stitches.

    These techniques are refined through experience. In our crochet courses online, we provide video tutorials and community support for navigating these challenges, especially when multiple colors are involved in a single row.

    How to Read the Graph

    Understanding the graph is key to knowing how to crochet a graphghan effectively:

    • If you’re right-handed, read odd rows from right to left, and even rows from left to right.
    • Each square equals one stitch (usually single crochet).
    • Color symbols or legends guide you on when to switch yarns.

    If you’re just starting out and still learning crochet for beginners, begin with a simple chart, maybe 20×20 squares, before scaling up to more intricate designs.

    Helpful Tools for Graphghan Success

    You don’t need a fancy setup, but these tools help:

    • Highlighters or washi tape to mark your place on the chart
    • Row counters to track progress
    • Tablet apps (like Knit Companion) for digital pattern tracking

    These are small things, but they make a big difference. At My Creative Butterfly, we always encourage our students to work smarter, not harder, especially when tackling larger projects like graphghans.

    Blocking and Finishing

    Once your graphghan is complete, you’ll want to block it to smooth the edges and even out the stitches. Blocking helps set the shape, especially if you’re piecing together multiple squares.

    Just like we teach in our blog on how to block a crochet hat, you can use steam or wet blocking to get professional-looking results. It’s a satisfying final touch after weeks (or months) of dedicated work.

    Tips to Stay Motivated

    Graphghans are beautiful but time-consuming. Here are ways to stay inspired:

    • Break the project into sections.
    • Celebrate each completed row or image.
    • Share your progress online or in crochet communities.

    Many of our learn to crochet students say completing their first graphghan was one of the most fulfilling experiences in their crafting journey. The feeling of watching your design appear stitch by stitch is hard to beat!

    Why Makers Around the World Trust My Creative Butterfly

    At My Creative Butterfly, yarn craft is and always will be part of our very existence. Our founder, Natasha, is an autodidact artist with 20-plus years of crochet adventure. She is famous for her realistic crocheted flowers and micro-miniatures, and her works are greatly inspired by the splendor of nature and, more specifically, floral forms.

    We believe every creation, from a tiny flower to a huge graphghan, tells a story. Through a blend of heartfelt personalized direction, design zest, and practical mentorship, My Creative Butterfly has ushered thousands of makers from the beginning to the realization of their vision.

    These designs tend to have floral parts entwined into the graphghans and symbolize the bond that Natasha feels with nature’s beauty. Now, if you plan on making anything from a butterfly pattern to a sunflower square to a full nature-inspired afghan, My Creative Butterfly stands behind you all the way.

    One thing we do is give personalized support and critique, not just about your stitching but in planning your project, color coordination, and finishing techniques. That’s what allowed My Creative Butterfly to become a reliable name in the crochet arena.

    Learning Resources

    If you’re looking to dive deeper into how to crochet a graphghan, there’s no better time than now to explore:

    We also offer tips for learning crochet for beginners, starting with color changes, yarn control, and basic stitch structure.

    With every project you complete, you grow, and at My Creative Butterfly, growth is exactly what we celebrate.

    Final Thoughts: Is a Graphghan Worth the Effort?

    Absolutely. While learning how to crochet a graphghan takes time, focus, and practice, the results are truly breathtaking. Whether a baby blanket with a favorite cartoon character or a throw covered with blossoming flowers, a graphghan is more than just a project-it is a memory shared, an offering made, and a piece of art.

    At My Creative Butterfly, we have seen one fine graphghan transform our students from insecure beginners to confident creators. There is nothing stopping you from going through that transformation, too, with a little patience, the right tools, and some creativity.

    FAQs

    What is the best stitch for a crochet graphghan?

    The stitch that best complements a crochet graphghan is certainly that of single crochet. It is simple and tight in nature, providing a crisp, pixelated finish onto which detailed images can be applied. When learning how to crochet a graphghan, single crocheting is highly suggested for beginners, for each stitch corresponds exactly to one square on the graph, facilitating pinpoint color placement. Though techniques such as corner-to-corner (C2C) or Tunisian may be used, SC commands the highest favor due to its neat, uniform finish. Mastering this stitch is a key step in understanding how to crochet a graphghan successfully and beautifully.

    How to change colors when crocheting a graphghan?

    To switch colors while crocheting a graphghan, start the new color yarn off on that last yarn-over of the previous stitch. This makes the color change smoothly. Carry the other color along the back of the stitches or between the stitches so they do not tangle, or even use bobbins. It is very important when learning how to crochet a graphghan to practice clean color changes to keep the design crisp and precise. Always plan the placement of your yarn beforehand and stay very faithful to the graph. Becoming proficient in this method is another leap forward to mastering how to crochet a graphghan with crisp lines, bright images, and professional-looking finishes.

    What is a graphgan crochet?

    A graphgan is a crochet blanket made by following a graph or pixel chart to create images, patterns, or text in the fabric. The name is created by combining the words “graph” and “afghan”. One square on the graph corresponds to one stitch, so yarn colors must be changed accordingly to reflect the design. Popularly used techniques are single crochet, corner to corner (C2C), and Tunisian crochet. If you want to learn how to create something magnificent, graphghans provide you with an artistic way of converting drawings or pictures into blankets. Learning how to crochet a graphghan involves reading the charts, changing colors smoothly, and keeping tension consistent throughout.

  • How to Block Cotton Crochet?

    How to Block Cotton Crochet?

    Arriving cotton crochet sometimes comes wavy, curling at the edges, or totally away from the fine finish you might have in mind. Wondering how to block cotton crochet? A very simple answer would be: by gently shaping your finished work with moisture and tension using wet blocking, spray blocking, or steam blocking to allow your cotton fabric to lie flat, stretch evenly, and show itself at its best. Blocking cotton will allow your stitches to truly show as well as impart a finishing character to your creations that looks truly well-made. At My Creative Butterfly, we have assisted thousands in crafting that perfect look, from doilies to garments to household decor.

    Why Block Cotton Crochet?

    Cotton yarn is a favorite among crocheters for the very reason that it is hard-wearing and breathable yet with excellent stitch definition. Being cotton, its stiffness restricts any shape change. Hence, learning how to block cotton crochet becomes crucial. It sets the project to the right dimension, tidy, and well-structured. Whether it is a lacy shawl or heavy texture table runner, blocking makes a fine finishing touch on any cotton crochet work.

    At My Creative Butterfly, we have seen so many students take their work from pretty to professional simply by learning to take blocking seriously in the process.

    Best Time to Block Cotton Projects

    You don’t have to block every single item you crochet, but blocking is highly recommended for:

    • Lacy patterns that curl or bunch
    • Items that require specific measurements
    • Garments that need to drape properly
    • Square motifs that need to join cleanly

    Especially if you’re just beginning to learn crochet stitches, blocking helps you see how your stitches truly come together. It’s also a vital step when you begin to learn crochet patterns and want to ensure that your pieces match the pattern dimensions exactly.

    Different Methods: How to Block Cotton Crochet

    When it comes to how to block cotton crochet, there are three popular methods you can choose from depending on the type of project and how delicate your piece is.

    1. Wet Blocking

    Best for: Garments, lace, and large items

    • Soak the cotton crochet piece in lukewarm water for 15–20 minutes.
    • Gently squeeze out excess water—don’t wring it.
    • Lay the item flat on a towel or blocking board.
    • Shape it with your hands and pin it if necessary.
    • Let it air dry completely.

    At My Creative Butterfly, we often recommend wet blocking for floral shawls or detailed doilies. It allows the fibers to relax and stretch, making every stitch pop.

    2. Spray Blocking

    Best for: Small or lightly shaped items

    • Lay your item flat on a clean towel.
    • Spray with water until it’s damp.
    • Use your hands to shape the piece.
    • Secure it with pins if needed.
    • Let it dry in a ventilated area.

    Spray blocking is a favorite method for students in our beginner crochet course, especially when they want a simple and quick fix to curling edges or uneven corners.

    3. Steam Blocking (with caution)

    Best for: Items that need light shaping without washing

    • Place your cotton piece on a flat surface.
    • Use a steam iron or garment steamer, keeping it slightly above the fabric.
    • Hover over the piece and let the steam do the work don’t press the iron down.
    • Shape as needed with your hands.

    Steam blocking requires a bit more control, so we introduce this technique in our advanced crochet course, where precision and confidence with materials are higher.

    Essential Tools for Blocking Cotton

    If you’re getting serious about learning how to block cotton crochet, a few basic tools can make the process easier and more effective:

    • Rust-proof pins or blocking combs
    • Foam mats or blocking boards
    • Measuring tape
    • Towels and spray bottle
    • Steam iron or garment steamer

    When creating nature-inspired motifs, like the realistic floral patterns we love at My Creative Butterfly, these tools help capture delicate curves and petal shapes.

    Fiber Facts: Why Cotton Behaves Differently

    Cotton absorbs water easily and has little natural elasticity. Once blocked, it will stay in that shape until washed or stretched again. That’s why accuracy matters when you’re learning how to block cotton crochet.

    We frequently cover this in our crochet courses online, where students often experiment with swatches to understand how different yarns react to moisture and tension. Cotton may seem unforgiving at first, but with blocking, it becomes your most reliable ally for structure and form.

    Blocking and Stitch Definition

    One of the most satisfying aspects of blocking cotton crochet is how it enhances stitch clarity. Intricate designs, such as shells, picots, or filet work, often look cramped or uneven before blocking.

    Many students come to My Creative Butterfly unsure about their progress, thinking they’ve made a mistake, only to see their work transform beautifully after blocking. We teach that understanding how to block cotton crochet is essential not just for finishing, but for truly seeing your artistry shine.

    When Not to Block

    Although blocking is a powerful tool, there are a few scenarios when it may not be necessary:

    • Very dense pieces like potholders or scrubbers
    • Projects meant to stretch naturally (like market bags)
    • Items already sized correctly without curling or distortion

    Still, having the knowledge of how to block cotton crochet means you’re equipped to make the best decision for each individual piece.

    Step-by-Step: How to Block Cotton Crochet (Wet Blocking Example)

    1. Fill a basin with lukewarm water.
    2. Soak your crochet item for 15 minutes.
    3. Lift gently, pressing out water without twisting.
    4. Place on a towel and roll it up to absorb excess water.
    5. Lay flat on a blocking surface, pin into shape.
    6. Allow to dry completely, this may take up to 24 hours.

    We’ve walked hundreds of students through this exact process at My Creative Butterfly, especially when working with large-scale doilies or elegant cotton garments.

    Blocking and Pattern Accuracy

    When you’re following written or charted designs, blocking ensures that your finished piece matches the intended dimensions. It’s a concept we heavily emphasize in our crochet pattern writing course and crochet pattern design course.

    If you plan to submit your work to publications or sell your designs, learning how to block cotton crochet will enhance your professionalism and build trust with buyers or readers.

    My Creative Butterfly: A Trusted Guide

    At My Creative Butterfly, we’re more than just a crochet brand, we’re a community. Founded by Natasha, a self-taught artist with over 20 years of experience, our mission is to support creative journeys with real guidance and heartfelt designs.

    From crocheted realistic flowers to micro-miniature artistry, Natasha’s love for floral forms inspires every detail of our tutorials and patterns. Blocking is a major part of that. If you’ve ever admired the symmetry and detail of our floral pieces, know that learning how to block cotton crochet played a huge role.

    Learning Cotton Blocking Through Practice

    If you’re still unsure about blocking cotton projects, start with small swatches. Practice each technique wet, spray, and steam on basic motifs. See how your cotton responds.

    Our learning crochet for beginners pathway includes a full section on blocking, and we often include before-and-after examples so you can visually appreciate the difference.

    A Real Example from My Creative Butterfly

    One of our most loved tutorials at My Creative Butterfly is a sunflower wall hanging made with 100% cotton. Before blocking, the petals curled slightly and the center puffed unevenly. After gentle wet blocking, the sunflower lay flat, opened beautifully, and looked vibrant. This is the magic that happens when you understand how to block cotton crochet properly.

    Final Thoughts: Make Blocking Part of Your Crafting Routine

    Blocking may seem like an extra step, but it’s truly an essential finishing technique, especially when working with cotton. Once you learn how to block cotton crochet, you’ll never look at your projects the same way again. Your stitches will lay flatter, shapes will stay truer, and your work will stand out.

    At My Creative Butterfly, we believe that every project is a story in yarn. And blocking? That’s the moment your story comes to life sharp, vivid, and complete.

    FAQs

    How do you block 100% cotton crochet?

    To block, the finished work made with 100% cotton crochet should be soaked in lukewarm water for 15–20 minutes, and then excess water removed by gently pressing without wringing the item. Next, lay it flat on a clean towel or blocking board. Shape the item carefully to the desired dimensions, pinning the work down with rust-proof pins. The piece is left to dry fully in a good breeze. This treatment allows the stitches to become smooth, straightens curling edges, and enhances the drape. Knowing how to block cotton crochet is essential for achieving a neat, polished finish, especially for garments, lacework, and intricate designs made with 100% cotton yarn.

    How long to soak cotton when blocking?

    Gently press your cotton for blocking to soak in the water. For 15 to 20 minutes, allow the cotton fibers to soak in the water and thus soften for easy shaping. Any extra water has to be pressed out gently, and all twisting must be avoided, which will distort the crochet. When still damp, lay the piece flat, molding as necessary, then allow it to dry. Knowing how long to soak is very important in learning how to block cotton crochet, which in turn guarantees that the fabric relaxes enough to mold into the shape. Mastering how to block cotton crochet helps achieve a smooth, professional-looking finish every time.

    How to block a cotton crochet bag?

    For blocking a cotton crochet bag, soak the bag for about 15-20 minutes in lukewarm water and relax the fibers simultaneously. Squeeze the water out gently; do not wring it. Fill the bag with towels or paper to shape it internally so that it helps it hold its form. With that done, place the bag either upright or flat, adjusting the shape if necessary. Then leave it to air dry. Knowing windows of crochet cotton blocking would assist in structured projects such as bags, since it will provide good shape, smooth the stitches, and sturdiness. Learning how to block cotton crochet ensures your handmade bag looks neat and professional.

  • How to Block a Crochet Hat?

    How to Block a Crochet Hat?

    The satisfaction comes from finishing a hat all by hand, but sometimes even with perfect stitching and a lovely yarn, it just won’t sit on your head comfortably. Maybe it is a little off in shaping; maybe the stitches come out a little uneven. That’s where blocking comes in. If you’re wondering how to block a crochet hat, it simply means shaping your finished piece with moisture, like steam, wet, or spray, and placing it over a mold (like a balloon or bowl) to dry so it holds its form beautifully. It basically is the final step that turns an average project into something great. At My Creative Butterfly, we’ve learned that blocking is the secret behind many stunning hat finishes, and it’s easier than you might think.

    Why Blocking Matters in Crochet

    Before diving into how to block a crochet hat, it is imperative to demystify the reason behind blocking. Blocking is much more than merely shaping and shaping; it is the process of setting your stitches, softening the fabric, and giving a nearly finished, professional look to your hat. Be it wool, cotton, or a blend, blocking lets the fibers relax and be stretched into another shape. 

    In fact, many students who join our beginner crochet course are surprised to see how much blocking enhances the quality of their early projects. Anything that we create regularly at My Creative Butterfly, we emphasize this step, especially with hats, because they need just as much structure as they need to drape well.

    Methods: How to Block a Crochet Hat

    There’s no set-in-stone method to use in the blocking of a hat. The method chosen depends on the yarn, the stitch, and in the result desired. Here are the three common ways to understand how to block a crochet hat:

    1. Steam Blocking

    This is usually the technique used when blocking wool or acrylic hats needing gentle shaping. Using steam generated from a steamer or from ironing, hold the steamer or iron set to steam over the hat; do not allow it to actually touch the hat so as to not hamper the fibers. Shape it over a rounded object like a balloon-worthy bowl, and allow it to cool and dry.

    Steam blocking is practically a favorite technique here at My Creative Butterfly, especially for hats with detailed textures like cables or puff stitches.

    2. Wet Blocking

    Wet blocking works well for natural fibers such as cotton, bamboo, or wool. Immerse your finished hat in lukewarm water for 15-20 minutes. Take it out and gently squeeze the excess water without wringing. Then place the hat over a blocking form, which might be a mannequin head, a balloon, or even a rolled towel.

    This method is especially useful if you’re learning crochet for beginners, especially if they are working with soft yarns that require firm shaping.

    3. Spray Blocking

    Spray blocking is the gentlest method. You lay your hat flat or over a mold and spray water until it is just damp but not soaked. You can then shape it by hand. This method is useful with the delicate stitches and colorwork you want to stretch as little as possible.

    We recommend spray blocking quite often in our crochet pattern writing course, particularly with finer yarns or lace-weight hats.

    Choosing the Right Blocking Form

    If you’re serious about understanding how to block a crochet hat, then selecting a form or mold will go a long way in accomplishing it. Some popular choices are:

    • Inflated Balloon: Great for beanies and slouch hats. Just make sure the balloon size roughly matches a human head (about 21–23 inches in circumference).
    • Bowl or Mixing Bowl: Ideal for dome-shaped hats or berets. Invert it and cover with a clean towel before placing your damp hat on top.
    • Mannequin Head: Provides realistic shaping, especially useful for fitted hats or sculptural designs.

    At My Creative Butterfly, we love using mannequin heads for floral-inspired hats. With our deep love for nature, especially flowers, the precise shaping really brings the petals and layers to life.

    Blocking by Yarn Type

    A major part of mastering how to block a crochet hat lies in knowing your fiber:

    Wool and Wool Blends

    These fibers respond very well to steam and wet blocking methods. Wool is excellent for holding its shape after blocking, ideal for structured and textured hats.

    Acrylic Yarn

    Some might say that acrylic doesn’t block well; however, steam blocking works fine with it, just watch you don’t melt your fibers! At My Creative Butterfly, we always do a patch test for acrylic before steaming.

    Cotton and Linen

    These plant-based fibers love wet blocking. They’re strong when wet and stretch easily, making them perfect for lightweight summer hats.

    When to Block a Crochet Hat

    You may wonder, Should I block every hat I make? While it’s not always essential, if your hat curls, loses shape, or has uneven stitches, blocking will solve most of these issues. Learning how to block a crochet hat becomes especially useful when you’re making gifts, selling items, or submitting crochet patterns for publication.

    In our crochet pattern design course, students learn how a well-blocked sample can drastically improve the final look of their designs, especially in photos and marketplaces.

    Pro Tips for Perfect Blocking

    1. Check the Label – Always check yarn labels for fiber content and washing instructions before blocking.
    2. Use Pins or Clips – For brimmed hats, use rust-proof pins to secure the shape as it dries.
    3. Don’t Rush the Drying – Allow the hat to dry fully in a well-ventilated area before removing from the mold.
    4. Avoid Over-Stretching – Stretch just enough to shape, not distort the hat.

    We’ve refined these tips over the years of experience at My Creative Butterfly, and they consistently lead to beautifully finished projects.

    A Real-Life Example from My Creative Butterfly

    One of our most loved designs at My Creative Butterfly is a micro-miniature flowered baby beanie. With such tiny details, precise blocking is non-negotiable. We used steam blocking over a small balloon to help each petal sit right, and the result was a stunning, photo-ready piece.

    As a self-taught artist crocheting for over 20 years, I’ve found that blocking takes your work to the next level. Whether you’re crafting large floral hats or micro miniatures, how to block a crochet hat is an essential skill you’ll want in your crochet toolkit.

    Learning to Block: Resources and Support

    If you’re still unsure about how to block a crochet hat, don’t worry, it’s a technique that improves with practice. You can explore more through our curated resources:

    • For total beginners, our learn to crochet program gives an overview of finishing techniques including basic blocking.
    • Those looking to learn crochet stitches will benefit from practicing blocking with swatches before moving to full hats.
    • Our learn crochet patterns resource shows how shaping can affect the overall design.

    Blocking is a technique that’s often under-discussed in courses, but at My Creative Butterfly, we ensure it’s front and center in every lesson.

    Troubleshooting Common Issues

    Hat Still Misshaped After Blocking?

    Check your blocking mold, maybe the size wasn’t ideal. Try again with a better-sized form and re-wet the hat if necessary.

    Yarn Feels Crunchy or Flat?

    You might have over-steamed or applied heat too closely. Always test first on a swatch.

    We help students recognize and correct these common missteps in our crochet courses online, providing one-on-one guidance.

    Final Thoughts: Elevate Your Hat Game with Blocking

    Wherever you stand in your crochet odyssey, having a grasp of how to block a crochet hat brings to the fore the best finish. That finishing touch is the polish and structure dusched fair in the long life of the hat itself. Be it your first step into a beginner-level crochet course or polishing techniques through an advanced crochet course, never overlook the importance of finishing with a finish that needs blocking.

    At My Creative Butterfly, we believe that each handmade product carries a story. Blocking ensures that the story speaks loud and clear, in a beautiful and professional manner. With the inspiration drawn from all in nature and a great love for the craft, we encourage every maker to perfect their craft-evening closing ones are worth doing.
    So the next time you finish a hat and wonder if it could look a little better, you already know the answer yes, it can. Just remember everything you’ve learned about how to block a crochet hat and translate that knowledge in giving the shape the merits it deserves.

    FAQS

    How do you block a crochet hat?

    If ever you are curious about how to block a crochet hat, here is the method: gently shape the finished hat while moist and on a set mold. Blocking methods to choose from are steam, wet, or spray, depending on your yarn. Place the damp hat on top of a rounded form like a balloon, bowl, or mannequin head, the purpose being to shape the hat evenly, and allow it to dry completely with good ventilation. This way, the stitches get relaxed to set into their shape while giving the hat its perfect, professional finish. Therefore, learning how to block a crochet hat is something necessary for the better look and sturdiness of your project.

    How do you close off a crochet hat?

    Properly closing the crown of a crochet hat entails weaving the yarn in and out of the final round of stitches with a tapestry needle and tightening it to bring the top securely together. Tie a knot to secure the stitches, and weave the tail back inside the hat under a few stitches for a neat finish. This method ensures a smooth, rounded crown. At this point, you might also want to give it a better shape, which requires you to learn how to block a crochet hat. Blocking helps your hat hold its shape while softening the fabric and bringing out stitch definition. Knowing how to block a crochet hat really makes your finished work look professional.

    How to block crochet items without blocking board?

    For blocking, there are anything blocking aids around the home. Flat pieces get laid over a clean towel or foam mat, covered with rustproof pins to keep them in shape while steaming or spraying to set the stitches. For curved pieces such as hats, think bowls, balloons, or a mannequin head for the mold. Knowing how to block a crochet hat without the fancy tools means you can get your project looking professional right at home. Whether shaping hats or flattening motifs, moisture, shaping, and allowing the piece to dry are key; hence, learning how to block a crochet hat is not hard and flexible.